Ranch Chicken

I tried a new recipe last night.

It was a blend of two different recipes I’d found on the internet that I wanted to try – both called Ranch Chicken but very different in their approach/ingredients. So, being the daredevil that I am, I decided to make my own version by blending the basic pieces of the two.

It was a huge success. So much so that I couldn’t get a picture because my family gobbled it up!

This will most definitely go into my regular rotation for the future.  I served it with some chicken-flavored rice (a-la Rice-a-Roni type rice) and steamed veggies.  There was barely enough left for SuperMan to make a lunch plate for himself. And none for me to make a lunch plate. But I like it that way. That means they liked dinner!

A couple notes –

– I used a combination of panko and corn flakes. Mostly because I was almost out of panko but also because I was blending two recipes and one called for panko and the other for corn flakes. We really liked the crunch of the corn flakes and I’ll probably do just those next time.

– my Houston House Seasoning is a staple in my kitchen. I use it on almost every savory dish I make. It’s so easy to keep blended in an old spice container and I just sprinkle it on my dishes as I season. I like the combination of flavors that it adds to every dish.

– another staple in my cooking is Mrs. Dash Garlic Blend. I use it on almost everything. Salt free and full of flavor.  I buy the huge bottles at the warehouse store – that’s how much I use it!!

– I cooked these on top of a wire rack on a cookie sheet/jelly roll pan. That allowed the air to get all around the chicken and kept it from getting soggy on the bottom. If you don’t have a wire rack, you could just put the chicken on your cookie sheet. I think it’ll be just fine.

On to the recipe:

Ranch Chicken

1 cup mayonnaise
1-2 Tbsp. Ranch Seasoning (I use Hidden Valley Ranch – another thing I buy in bulk quantities) + more for seasoning the breading
~ 1 Tbsp. Houston House Seasoning + more for seasoning the breading
~ 1 Tbsp. Mrs. Dash Garlic blend + more for seasoning the breading
2 cups Panko bread crumbs OR Crushed Corn Flakes
1/2 cup grated parmesan cheese
4 boneless skinless chicken breasts

  1. Preheat oven to 375 degrees.
  2. In a large (gallon) zip lock bag, mix the mayonnaise, ranch seasoning, house seasoning, and Mrs. Dash
  3. In another large zip lock bag, mix the bread crumbs/corn flakes, parmesan and some additional house seasoning, ranch seasoning and garlic blend
  4. Place chicken breast in mayonnaise bag and shake to ensure it’s well coated in the mayo mixture.
  5. Place coated chicken in the breading bag and shake to ensure it’s well coated.
  6. Place the chicken on a wire rack (sprayed with cooking spray) that’s been placed on a jelly roll pan/cookie sheet.
  7. Repeat with all the chicken breasts.
  8. Bake 45 minutes at 375 degrees.

Give it a try and let me know what you think.
Sorting Saturday 

  
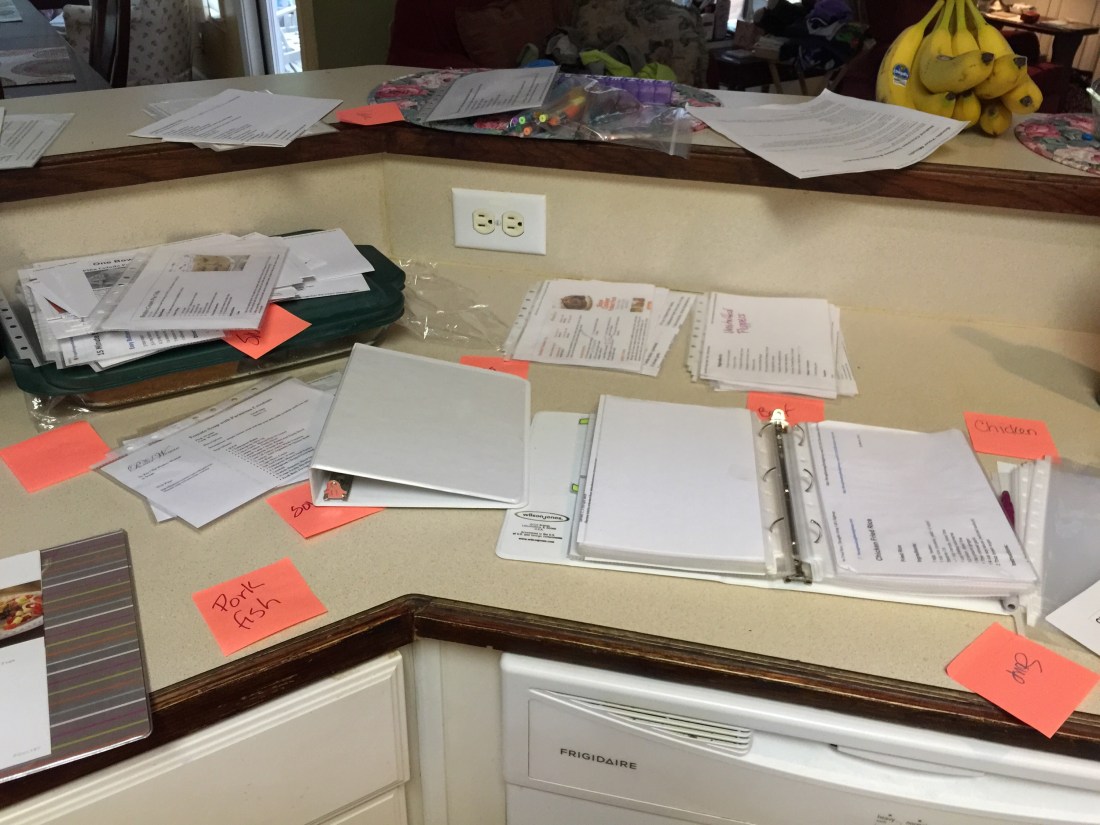
I’m busy sorting recipes today. Getting my pile of printed recipes sorted and in binders. 

Just came across one and thought “That looks good!” (It was one of my own recipes! LOL)

If you’d be interested in seeing my recipe management system, let me know!

What are you up to today?

Cream Cheese Coffee Cake

This recipe is one of my old standby recipes for whenever I’m having people over. It’s a sure-fire winner and everyone seems to love it (and most people request the recipe)  Add to that, it’s pretty simple to make and most of the ingredients I always have on hand and it’s a winner for me.

IMG_2237

It makes a 13×9 sized pan full of yummy, creamy goodness. Perfect with a cup of tea or coffee and some good friends and good conversation.

I made it just this week when I had some ladies over – and shared the leftovers with my neighbors.  Which is part of why I’m posting the recipe here – my sweet neighbor’s son requested the recipe.

It may look complicated when you first look at the recipe below, but trust me, it’s simple.  And you can have it in the oven in about 10 minutes if you have all the ingredients at room temperature when you’re ready to begin. It goes together a lot better when the cream cheese and butter are soft.

So, CB, this is for YOU!

IMG_2236

Cream Cheese Coffee Cake

Filling:

2 8 ounce packages of cream cheese (I use low-fat)
1/2 cup sugar
1/2 tsp. of vanilla extract
1/2 tsp. of almond extract (optional)
1 egg

Cake:

3 cups all-purpose flour
1 tsp. baking powder
1/2 tsp. baking soda
1/2 tsp. salt
1/2 cup (1 stick) butter (softened)
1 cup sugar
4 eggs
1 tsp. vanilla extract
1 tsp. almond extract (optional)
1 cup sour cream (you can use light or regular)

Streusel topping:

1/4 c sugar
1/4 c flour
3 Tbsp. butter (CHILLED AND CUBED)

Glaze:

1/2 c powdered sugar
3 tsp. milk

  1. Preheat oven to 350.
  2. Spray a 9×13 pan and set aside.
  3. In a small mixing bowl, combine the filling ingredients (use an electric mixer for the best mix possible). Set aside.
  4. In another mixing bowl, combine the cake ingredients, beginning with the butter and sugar.
  5. Add the eggs one at a time and the extracts.
  6. Finally, add the dry ingredients alternately with the sour cream.
  7. Spread half of the cake batter in the 9×13 pan.
  8. Add the cream cheese filling on top of the batter, spreading carefully with a spatula (offset spatulas work great for this)
  9. Top the cream cheese mixture with the remaining cake batter.
  10. Use a fork or spatula to “swirl” the batter/cream cheese once or twice.
  11. In another small bowl, use a pastry blender or fork (or your hand held mixer if you have a low setting) to combine the topping mixture.  Be careful not to over mix. It should look like “sandy gravel” when it’s properly combined.
  12. Sprinkle the streusel topping over the cake.
  13. Bake for 40-45 minutes until the top is golden brown and the center is cooked. (You can tell by inserting a toothpick – if it comes out clean, it’s done.)
  14. Let cake cool for about an hour and make the glaze.
  15. Drizzle glaze over the cooled cake and let set before serving (if you can wait that long!)

Easy weeknight supper idea

For the past month or two (or maybe longer) Little Bit has been asking me to make “pizza bread” for dinner.  I made it once a long time ago and it was apparently one of her favorite incarnations of pizza that I have made.

I’ve resisted making it because, frankly, it was a lot of trouble.  Making the dough, letting it rise, rolling it out, chopping up all the ingredients, etc.  And it has just seemed like we were too busy to bother making it again.

But she has persisted in asking and so, when I saw that the grocery store had French bread dough on sale last week, I decided to try an experiment.

And it worked!

Super easy, super fast pizza bread!

A perfect weeknight dinner idea, ready within 45 minutes and so very tasty. Almost as good as the made-from-scratch version.  The family loved it and I loved how easy it was.

Here are the cast of characters:

Easy Peasy Pizza Bread Ingredients

Not pictured, frozen bell peppers (chopped) and Italian seasoning.

The most difficult part of making this dish (and seriously, this is not difficult) was unrolling the bread dough.

Unrolling the dough
Unrolling the dough

Once I unrolled the dough, I sprinkled it with the mozzarella cheese blend and added the toppings.  We like sausage, pepperoni and bell peppers. I was super lazy last night and used frozen bell peppers that SuperMan had chopped for me when we only needed half of a pepper for a recipe.

Toppings
Toppings

(I hadn’t put the cheese on yet in this picture)

Once I had all the toppings in place, I rolled the bread back up into a loaf, sealed the seams and the ends and popped it into the oven.  I baked it at 350 for about 35 minutes.

While that was baking I warmed up some spaghetti sauce I had left over from another recipe. You could certainly use jarred sauce if you have that, too.

Once it was finished, we sliced the bread and gobbled it up.

And I mean, literally gobbled. I didn’t get a single picture of the finished product!

Seriously, though, this was so easy and perfect for a busy weeknight meal.

I hope you give it a try.

Quick and Easy Pizza Bread

Pillsbury prepared French bread dough
Shredded Italian cheese blend
pepperoni slices
Cooked sausage crumbles (I used Jimmy Dean frozen turkey sausage crumbles)
chopped bell pepper

any other pizza toppings you like

  1. Unroll the bread dough. (I did this on my silpat baking mat. If you do it on your counter be sure you spray it with cooking spray first so it won’t stick)
  2. Sprinkle about 1 cup of cheese on the dough
  3. Add your toppings
  4. Roll the bread dough back up, sealing the seams and the ends. Score the top with 2-3 shallow slices to allow for expansion in the oven.
  5. Bake at 350 for 30-40 minutes until golden brown.
  6. Allow to cool for about 5-7 minutes before slicing and serving with warmed spaghetti sauce.

Back to school means back to menu planning

Tomorrow the girls start school. With that milestone, many things will be changing in our household. Most notably, we’ll be getting back on a regular schedule. No more dinners at 8PM and bedtimes creeping closer and closer to 11PM (!). We’ll be back to eating dinner at 5:30-6:00 each evening and bedtimes closer to 9PM.

AND – I’ll be back to menu planning. I’ve sort of kept it up all summer. But I have been pretty loosey-goosey with the plans.  Thankfully, I had a lot of meals in my freezer and we were stocked up on meats there, too. I have been trying to “cook down” the freezer as much as I could. Especially since it was so hot and our poor, ancient freezer was not doing the best job keeping everything frozen. (soft serve ice cream, anyone?)

ChickenDumplings-Page-050_thumb.jpg

So, I thought I’d share with you the list I brainstormed to help me when I’m stuck on my menu plan. I went through a lot of my old menu plans, picked out the favorites and the tried-and-true hits.  These are the ones that will be my go-to items this fall when life is crazy and I need inspiration as I’m planning out my week’s meals.

Menu Ideas:
Chicken Enchiladas(crockpot/oven) Potato Soup
*recipe coming soon*
Tacos Beef Stew
Chicken Stir Fry
(served with
Fried Rice)
BBQ Chicken
Fajitas Asian Chicken
Bourbon Street Chicken (crock pot) Roast Beef (crock pot)
Shredded Beef Burritos (crock pot/oven) Salisbury Steak with Mushroom Gravy
Meatloaf Beef Tips with Gravy
*recipe coming soon*
Ham & Rice & Black-eyed peas Creamy Chicken & Rice (crock pot)
Chicken Chili Chili
Baked Potato with Salad Shepherd’s Pie
Sub Sandwiches Breakfast for Dinner
Homemade pizza Pizza Bread
*recipe coming soon*
Salmon Croquettes Cuban Pork with Black Beans & Rice
Beef Stroganoff Pasta Fagioli
Chicken Noodle Soup Chicken &Wild Rice Soup
 Chicken & Dumplings “ Rotisserie” Chicken (crock pot)
 Bourbon Chicken
How about you?

Do you menu plan? What are your family’s favorite meals?

Click on the links to access the recipes.

Chicken & Wild Rice Soup

My friend, Cindy, who makes the most wonderful meals, made this soup for our family one night not too long ago.  After that dinner the girls and I kept thinking about, and talking about that soup.  We just had to have more.  It was so good!

My first attempt at re-creating the soup was not quite as good as Cindy’s was.  She had used a specific wild rice blend and my homemade spice blend did not quite match.  The soup was good, but a little spicy (I think too much ginger) and the girls weren’t crazy about it.  It most definitely wasn’t Cindy’s soup and that was what they wanted.

So, I waited a week or two and went back to the drawing board… or cutting board, that is.

My second attempt was much better and was quickly gobbled up by the entire family.  As a matter of fact, ALL of the soup was gone, which almost never happens at my house.  The girls even asked for it in their thermoses for lunch.

Success!

This is a great, hearty and comforting soup. Perfect for a rainy or cool fall day.  Leftovers are great – the rice absorbs as lot of the broth but it is still very good and you can always add more broth or water if you want it thinner.  We liked it just fine with less broth and it was so tasty even two days later.

I have no picture because there was nothing left to take pictures of!  Try it anyway. Smile

Chicken & Wild Rice Soup

Ingredients

1 pound chicken (I used a combination of thighs and breasts)
water for stock pot
chicken bouillon cube
1-2 stalks celery
1-2 carrots
1 small onion
~ 1 Tbsp garlic (minced)
2 boxes Uncle Ben’s Wild Rice (including spice packets inside)
salt/pepper
Houston House Seasoning
~1/2 – 3/4 cup half and half (or milk)

Instructions
  1. Dice celery, carrots, garlic & onion.  Add to stock pot with water and bouillon cube. Bring to a boil, adding chicken and seasoning generously with salt/pepper and Houston House Seasoning.
  2. Remove chicken and shred, reserving broth.
  3. Stir the rice and seasoning packets into the broth.
  4. Add chicken back to soup and bring to a boil.
  5. About 10 min before serving, add the half and half.  Bring back to a simmer.

It’s super easy and super, super good. I hope you give it a try.

Cinnamon Bread

I found this recipe on Pinterest (imagine that!?!) and decided that it sounded way too good to not try it out.

Amish Cinnamon Bread was what the recipe was called, but then she talked about how it was an alternative recipe to traditional Amish cinnamon bread which, apparently takes a long time to make.
I have to say, this one didn’t take long at all.

IMG_3147And it was really, really good.

Most definitely worth the trouble to make.  And, really, it wasn’t that much trouble anyway.

As you can see here, the recipe makes two LARGE loaves.  As a matter of fact, next time I make it I will probably make three loaves.  See the “overflow” in the oven there?  It was like the incredible alien-possessed bread when it baked.

It rose

and it rose

and it rose

all over my oven.

IMG_3146

So, a word of caution to you. Put a cookie sheet under your loaf pans when you bake this.

And maybe consider putting into three loaf pans instead of two.  Makes good gift-giving.

The bread itself is very light and fluffy. Almost cake-like. But not too sweet. Just enough. Especially with a cup of tea in the morning (or coffee).

I think, too, it would be good to make in muffin form to have for easier sharing for a crowd.

Of course, this is so good you are not going to want to share. But there will be plenty so share away.

IMG_3147

Cinnamon Bread

Makes 2 or 3 loaves

Batter:

1 cup butter, softened
2 cups sugar
2 eggs
1 tsp vanilla
2 cups buttermilk
( You can make buttermilk with 2 C milk + 2 Tbsp vinegar or lemon juice. – Let it sit for about 5 minutes before you use it.)
4 cups flour
2 tsp baking soda

Cinnamon/sugar mixture:

1 cup sugar
2-3 teaspoons cinnamon

Instructions:

  1. Cream together butter, 2 cups of sugar, and eggs.
  2. Add milk, flour, and baking soda.
  3. Put 1/2 of batter (or a little less) into greased loaf pans (1/4 in each pan).
    If you are making 3 loaves, split the half of the batter between the three loaf pans, reserving the other half for the next step.
  4. In a separate bowl, mix cinnamon and sugar together.
  5. Sprinkle 3/4 of cinnamon mixture on top of the batter in each pan.
  6. Add remaining batter to pans; sprinkle with remainder of cinnamon sugar mixture.
  7. Swirl with a knife.
  8. Bake at 350 degrees for 45-50 min. or until toothpick tester comes clean.
    Be sure to put cookie sheets below the loaf pans in case you have some overflow.
  9. Cool in pan for 20 minutes before removing from pan.
    (this is important or it will fall apart. this is not a bread you can eat straight out of the oven)
  10. Slice & serve.

Mother’s Day, Menu Planning and Counting Down to Summertime

Happy Day-After-Mother’s-Day everyone!

I hope those of you who are mothers (by nature or by heart) had a terrific day and were spoiled and pampered by your families.  We had a nice day here.

SuperMan and the girls gave me some beautiful plants ~ a fern and hibiscus for my back deck ~ and some very sweet cards that were made with lots of love and care by them.  I also got the devotional that I’ve been eyeing for a long time – very excited about digging into that one.

Little Bit made the cutest things for me at school:

IMG_2512

LOVE the answers she put – especially #10, #12 and #4.  A Spa Day at Disney World – so cute! And #7 – I guess she forgets that I do that for work! LOL

Here’s a shot of the three of us girls that SuperMan took yesterday –

IMG_3208[1]

mealplanmonday_v1

And moving on to Menu Planning and back to the real world, here’s what we have planned this week:

  • Fajitas (using up some freezer meats)
  • Grilled chicken breasts with pesto pasta
  • Hamburgers on the grill

What’s on your menu for the week?

We’re also counting down the days until Summer Break – 10 and counting. We can hardly wait!!!


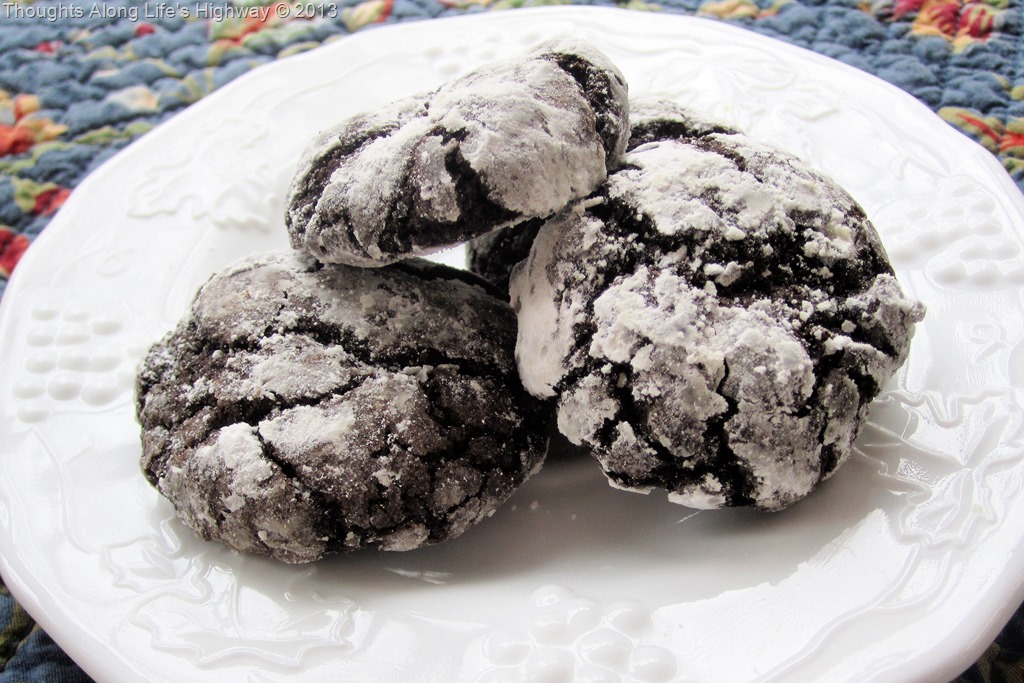
Heaven in a cookie

A friend of mine made these cookies a few weeks ago.
It was love at first bite for me.

Seriously.

I wasn’t sure I was going to be able to restrain myself. They were SO good.

So, of course, I got the recipe.

IMG_2440

And tried to figure out when I’d have a good excuse to make a batch (or two).

That opportunity arose last weekend.  We were having a weekend picnic with our friends and then hiking afterwards.

Hmm… hiking = burning calories. I must find a way to replace said calories.

I know!

COOKIES!

And thus the baking began.

These are sort of a cross between a cookie and a brownie.  They have a little “bite” to the outside of them, but the inside is moist and soft (and chocolately) like a brownie.

They’re seriously good.

Dangerously so.

The original recipe is a Williams Sonoma recipe.  I changed mine up just a bit, so the recipe below is how I made them.

My friend tried one of mine on Sunday – she loved the modifications I’d made. I’d call that success!

IMG_2439

Chocolate Crinkle Cookies

Ingredients:

1/2 cup powdered sugar (or more if needed)
1 2/3 cup all-purpose flour (I used King Arthur white whole wheat)
1/2 cup Hershey’s Special Dark Cocoa Powder
1 1/2 tsp baking powder
1/4 tsp salt
1 stick (8 Tbsp) butter, at room temperature
1 1/4 cup sugar
2 eggs
1 tsp vanilla extract
1/2 tsp peppermint extract (optional)

Instructions:
  1. Preheat oven to 350 degrees F.
  2. Place the powdered sugar in a small bowl and set aside.
  3. If you don’t have a nonstick mat for your cookie sheets, grease them (2) with butter.
  4. In a large mixing bowl, combine the butter and sugar until creamy.
  5. Add one egg and beat until blended.
  6. Add the other egg and extracts and combine.
  7. In a separate bowl, combine the flour, cocoa, salt & baking powder.
  8. Slowly add these ingredients to the egg/butter/sugar mixture, keeping your mixer speed on low.  The dough will get thick quickly. Beat until just blended.
  9. Using a tablespoon (or cookie scoop) scoop up a rounded spoonful of dough. Form into a ball.
  10. Roll the cookie balls in the powdered sugar to coat.
  11. Place on the cookie sheets, about an inch or two apart. (I got four across on my cookie sheets)
  12. Bake 10-12 minutes. You’ll know they’re done when they are cracked and puffy.
  13. Remove from the oven and set aside to cool for about 2-3 minutes.
  14. Remove from baking sheet and allow to cool completely on wire racks.
  15. Store in an airtight container. (makes about 24 cookies)

Die of happiness.

You can thank me later. Smile

Wonderful Waffles for Supper

I’ve gotten on a “breakfast for dinner” kick.

It’s super easy, inexpensive, and lets you enjoy some breakfast-y things that you would not normally have time to make during the week at breakfast time.

Like waffles.

You see, I’m not a morning person. Never have been.

And so, my kids suffer at breakfast because I’m struggling most mornings to be vertical and coherent for them.  Cooking fantastical breakfasts is just not going to happen.

But cooking an awesome “breakfast” for dinner? Totally do-able.  I’m awake at 5PM, just not so much at 5AM.

So, we’ve been making breakfast for dinner the past few weeks… It’s sort of become our Thursday night dinner tradition since the kids aren’t wild about leftovers and Thursdays are a busy day with dance classes, etc.

I’ve been hunting for a good waffle recipe. Something that was a “scratch” recipe and not from a box.  Last week we tried one that was just okay. Not great, and not something we wanted to try again –

And so this week I went looking for new recipes to try.

What I found was that there are not too many variations – eggs, flour, sugar, etc.

What did differ was whether the egg whites were whipped or not.  The first recipe we had tried did not have the whipped egg whites and the waffles were flat – in taste and volume. I wondered if whipping would make a difference, but, quite honestly, it seemed like a lot of extra work. Was there really a payoff?

Then I found a recipe on Food Network’s website for “Waffles of Insane Greatness” which are from Aretha Frankenstein’s restaurant in Tennessee. Right off the bat I was intrigued – the name of the waffles, the name of the restaurant and the fact that it was a southern recipe.  Then I saw that you don’t have to whip the egg whites. Score!!

I had also found this recipe for the Very Best Waffles (they claimed) – I printed it out and compared to the Insane waffle recipe.  Pretty much the same with the exception of the addition of some spices.

I had one other requirement for my waffles that no recipe included but that was non-negotiable for me. They  had to have some added protein.  I couldn’t handle the carb-fest myself and wanted to be sure the family got a little more protein in their dinner, even if I had to sneak it in. I figured I’d improvise that part.

I headed into the kitchen to give it a go…

waffles

They turned out, well, wonderful…

So much so, that, as I’m typing I’m nibbling on one, cold & dry, and yet it’s still good.

The kids loved them, SuperMan devoured them, and after I ate one, I collapsed on my rocking chair in a blissful carb coma.  (but it was worth it)

So, give these waffles a try – it’s a fast and easy way to whip up some supper one night without a big ole mess in the kitchen.  Serve them up with some bacon, fresh fruit and you’ll have your family singing your praises…

Wonderful Waffles

Ingredients:

Dry ingredients:

3/4 cup all-purpose flour
1/4 cup cornstarch
1/2 tsp baking powder
1/4 tsp baking soda
1/2 tsp salt
1 1/2 tsp sugar

Wet ingredients:

1 cup buttermilk (or whole milk mixed with about 1 1/2 tsp white vinegar to make 1 cup of “buttermilk”)
1/3 cup vegetable oil
1 egg
1 tsp vanilla extract

Optional Ingredients:

1/2 tsp almond extract (optional)
1/8 tsp ground nutmeg (optional)
1/4 tsp ground cinnamon (optional)

2 scoops vanilla protein powder

Instructions:

1. In a mixing bowl, combine the dry ingredients.

2. If using, add the cinnamon & nutmeg to the dry ingredients.

3. In a measuring cup, combine the buttermilk, oil, extracts and egg. Combine gently.

4. Pour liquid ingredients into the dry ingredients and use a whisk to combine.

5. Let the batter sit for 5-10 minutes while your waffle iron heats.

6. Spray your iron with nonstick cooking spray and ladle some batter onto the iron. Bake them as per the instructions for your iron.

7. Serve immediately or keep warm in preheated oven until ready to serve.

A couple of things to note:

– I doubled the recipe and got 10 waffles. Depending on how many people you’re feeding you may need to double as well.

– I think next time I will preheat my oven to 200 degrees, as the one recipe suggests, and put the finished waffles on the rack in the oven to stay warm until they’re all finished being made. That way we can sit down and eat together rather than in shifts as I finish up waffles.

– The almond extract, nutmeg and cinnamon are completely optional but I put them in and I think it added a great flavor. Big Girl was not crazy about the nutmeg. I may leave it out next time since I’m the only one who is really nuts about nutmeg around here.

– The protein powder is also optional and using it only enhances your protein content of your meal. You don’t need to add any extra liquid if you it. (or take any away if you don’t)

– I had a few left after we ate dinner and I put those in a ziplock bag in the refrigerator for breakfast the next day.  I reheated them in the toaster oven.