Menu Plan Monday

Happy Monday, y’all. It’s a rainy one here today, but I’m not complaining because we had an absolutely beautiful weekend weather-wise and the rain we’re getting may put the tree pollen down a little bit – which would be a good thing since I am suffering seriously from the pollen. Like multiple antihistamines, inhalers, etc. seriously.  It’s the time of year, but I sure hate it… the pollen anyway. LOVE the flowers, not the pollen!!

I’m on the ball this week with the menu plan and I have to say I’m glad to be back into the routine. It is amazing how much stress/anxiety it relieves to know what is going to be dinner for the day and to be able to plan your day (and weekly shopping) around your meal plans.  I highly recommend you try it out if you haven’t yet.

If you’ve never tried menu planning, you might be interested in reading how I approach the process –

Part 1 is here and Part 2 is here. Here’s another post I had with some tips as well.

mealplanmonday_v1

Here’s what we’ve got on the docket for the week this week:

Monday: Beef Stew (trying something new, will let you know how the troops like it)

Tuesday: SuperMan is going to grill some chicken I got Sunday for 99 cents a pound (!) – BBQ Chicken anyone?

Wednesday: Salisbury Steaks (SuperMan’s request)

Thursday: Breakfast for dinner

Friday: BBQ Chicken pizza (if there’s any chicken left)

I also thought I’d share a little video with you today – this is my sweet Little Bit doing her sign language performance with her club at the Exceptional Child Week last week.  She did such a great job and we are so proud of her!!

(she is on the left – purple tennis shoes)


Off the needles: Baby Blanket

I decided I should rename this series to “OFF the needles” instead of “On the needles” since I seem to wait to share my projects with you after I’ve finished them –

This is the latest creation –

IMG_2258

Little Bit asked me to make a blanket for her teacher who just had a baby boy.  She had such fun in the yarn shop picking out just the right yarn – it had to be soft and fluffy and just the right shade of blue.

We decided on a chunky yarn – Deborah Norville Collection in the Ocean Foam colorway.

Isn’t it pretty?

I did an extended double crochet stitch to make the stitches a little higher – I only had 4 skeins so I wanted to get as big a blanket as I could with what I had.  It turned out really pretty – light and airy and yet really warm with the chunky yarn.

IMG_2261

Little Bit was so excited to take it to school to give to her teacher.

And now I’m trying to figure out what my next project should be. I’ve done three baby blankets in a row… and the weather is getting too warm for hats or scarves.  I’m thinking I may try my hand at a bigger project – a shawl or an afghan…

IMG_2259

Happy girl Smile

I’m not a fashionista, even if I wanted to be

I’ll admit it. I’m not a fashionista.

Never have been.

Probably never will be.

I love to look “smart” and to dress nicely but sometimes I think my idea of what is “nice” or “smart” is just a little off from what is fashionable these days.  Now, don’t get me wrong, I don’t expect much here – I’m  a middle-aged momma for Pete’s sake. I don’t want to look like a Desperate Housewife (even if I had the financial means to do so).

But I do want to look put together – and look like I am at least somewhat aware of the current trends in fashion, even if I am not a slave to them.  I work from home so there is really very little reason on most days to get out of my yoga pants and sweats, but I don’t think it is a good idea to fall into that trap long term.

I like looking nice. I want to look nice for the girls and SuperMan when they come home in the afternoons.  And I think I am more productive at work when I take the time to get myself together in the mornings. Kind of puts me in the right frame of mind.

And I most definitely don’t want to become a frumpy middle-aged momma. No way. No how.

I got an idea from a fellow blogger not too long ago… (hi, Daenel!)

She mentioned that she pins outfits she likes and then uses that to shop her closet and try to come up with similar outfits.

Isn’t that just the coolest idea?

She also posts a “What I Wore Wednesday” weekly post that I can’t wait to see each week. She has the greatest, quirky (self-proclaimed) style. I love seeing her outfits and wondering if I could pull them off, too. She’s inspired me.

To that end, I’ve gotten rather addicted to looking at the “Fashion” category in Pinterest. Granted, it’s kind of like looking at million-dollar homes and wishing that one day I’d have the means to live that way.  Most of what is on those “fashion” pins is aimed at a generation twenty years younger (or more) than me and for gals who are either not moms or have flatter tummies than I have Winking smile

as well as bigger shopping budgets than I do.

So, I’ve started pinning some things to challenge me to step outside my usual outfit combos.  I want to see if I can come up with some new outfits to wear without having to buy something new.

I’ll let you know how it goes –

In the meantime I thought I’d share some of my current favorite pins with you – (click on the picture to pin)

^ LOVE this – casual, yet fashionable & chic – especially the sweater &  necklace (and handbag!)

^ And loving the sweater, earrings & shoes above – I need to get some ballet flats this spring.

(can you see a trend here? – jeans, jeans, jeans)

^ This one I am in love with the necklace and top.

And I LOVE the lace top below. I bought an off-white lace top last year at T J Maxx and have yet to wear it because I didn’t know what to do with it in spite of being in love with it – this outfit gives me an idea or two –

I just need to get my hands on a rustic leather jacket now Winking smile

I have a grey sweater almost identical to this one – I think I’ll be trying this out this week (once the weather warms up)

And, finally, loving the polka dots and ruffles here. Every time I see polka dots it reminds me of my grandpa. He loved polka dots.  This is such a girly outfit, I just love it.

Now that I’ve pasted these here, I’m also seeing more than just a jeans trend – neutrals, feminine, etc.

It’s interesting to see what your tastes are when you’re picking without thinking about anything other than “hmmm…. I like that” and then you see the pattern that emerges.

Now to go plunder in my closets and see what I can come up with…

comments-graphic2_thumb.jpg

Cream Cheese Coffee Cake

I stumbled across this recipe on Pinterest and have made this coffee cake several times now  – with rave reviews every single time I make it.  Even my kids love it.

Coffee Cake

While the original recipe was really good by itself, I thought I’d share the recipe the way I make it, too.

Here you go –

Cream Cheese Coffee Cake

Filling:

2 Packages Neufchatel Cheese, softened (low-fat cream cheese)
1/2 cup sugar
1 tsp vanilla extract
1 tsp almond extract
1 egg

Cake:

1 cup sugar
1 stick (1/2 cup) butter
1 cup sour cream (low fat is fine)
4 eggs
1 tsp vanilla extract
1 tsp almond extract

1/2 tsp salt
1/2 tsp baking soda
1 tsp baking powder
3 cups all-purpose flour

Streusel Topping:

1/4 c sugar
1/4 c flour
3 Tbsp butter (chilled & cubed)

Glaze:

1/4 cup (give or take) powdered sugar
1 – 2 tsp milk

  1. Make the filling: In a small bowl, using a hand mixer, mix the filling ingredients until they’re well combined. Set aside.
  2. Preheat oven to 350F.
  3. Spray/Grease a 9×13 Pyrex cake dish.
  4. Make the cake:  In a mixing bowl, cream the sugar & butter.
  5. Add the sour cream and extracts.
  6. Add the eggs, one at a time, mixing until combined.
  7. Add the salt, baking soda and baking powder.
  8. Add the flour gradually (so you don’t have a flour storm in your kitchen)
  9. Spread about half of the cake mixture in the bottom of the 9×13 pan. You may need to use an offset spatula to spread the batter.
  10. Pour the filling on top of the batter in the pan.  Using a spatula, spread to form an even layer across the batter.
  11. Take the remaining batter and add to the top of the filling. You will need to carefully spread this across the filling to form a third layer.
  12. Make the streusel:  In a small bowl, mix the streusel ingredients with a fork. Or, if you have a small food processor/chopper, mix the ingredients in that. It is important that the butter be COLD to properly form the streusel.  You will end up with oatmeal-like texture if your butter is the proper temperature.
  13. Sprinkle the streusel on top of the batter.
  14. Bake 45 minutes at 350 degrees .
  15. Cool completely on a wire rack (about an hour or so)
  16. Make the glaze:  Combine glaze ingredients in a small bowl or measuring cup. Add milk SLOWLY until you get the desired, drizzly texture. Depending on humidity you will need more/less milk.
  17. Store in a cool place in a Tupperware or sealed container.  Refrigeration is probably a good idea in a hot climate.

This tastes absolutely divine with a cup of Earl Grey or coffee. And it’s not too shabby with a cup of cold milk, either. As a matter of fact, it’s pretty darn good no matter how  you serve it – even if you eat it out of your hand as you dash out the door to go somewhere. Not that I’ve ever done that or anything… wink, wink.

Menu Plan Monday (on Tuesday)

I spent a good bit of time in the last three days cooking – on Saturday I cooked for our church small group dinner (that was on Sunday) and made homemade pizzas/sauce for dinner. (pizza recipe coming soon!)

On Sunday I finished our church supper and served that (which turned out to be pretty good, given that there were little to no leftovers!) to our friends.  I made a nacho bar. It’s a great way to feed a crowd and make sure that everyone gets something that they enjoy without having things they don’t like. We set it up with a crock pot of seasoned black beans, ground beef, bean dip, melted cheese and Mexican rice.  At the other counter we had the toppings – cheese, sour cream, salsa, lettuce, tomato, onion, etc.  Everyone just went down the line and loaded up their chips with whatever they wanted – some of them made two trips through! Smile

And then yesterday, I cooked goodies for my ladies Bible study group.  I made some of the yummy cream cheese coffee cake IMG_2222
(my version will be on the blog tomorrow, I made some modifications to the original recipe I’ll share) and I also used up some brown bananas by making some banana-flax muffins.  Everyone raved about them, which is always nice, and now I have a kitchen counter filled with leftover goodies which really need to find a new home quickly! (and not in my tummy!)

So, thinking about menu planning for the week has been percolating in my mind but hasn’t really “officially” been written down.  I decided I was getting pretty slack here with menu planning so I needed to post it here for some accountability –

Monday: we had leftovers. I made some fresh mashed potatoes and we finished off the shepherd’s pie and roast beef & veggies from last week.

Tuesday: making stir fry chicken and fried rice

Wednesday: Meatloaf

Thursday: Chicken Pot Pie

Friday: Fajitas

Saturday: our new tradition is homemade pizzas

Sunday: dinner with our church friends

Later this week on the blog I  will be sharing the pizza dough recipe, the cream cheese coffee cake recipe and the latest crochet creation – stay tuned!

On the needles

Or, rather, recently OFF the needles!

IMG_2243

I just finished this baby blanket for a friend of mine. She’s due in April and I can’t wait to give this to her the next time I see her.

IMG_2244

I love how the bright, cheery colors turned out and am especially in love with the scalloped edges. (a first for me)

IMG_2245

It seemed like it took me FOREVER to finish this blanket – a lot longer than the last one I made. I think it’s because the yarn was a little bit smaller gauge than the last one I made, which was a chunkier yarn.  But I love how this one turned out, even if it seemed like the never-ending-blanket-project for a couple months.

And as soon as I finished I started the NEXT baby blanket.  Sheesh! How many people are having babies these days? Smile

IMG_2246

I’m just a blanket makin’ fool…

Very Pin-teresting!

Hey y’all – sorry I’ve been silent this week.  Took a little holiday and went to see Mom and then when we got home it was a little crazy around here. And every time I thought to write a blog post my brain would go blank. Rather than posting junk, I just stayed silent.

Today, though, I’m trying to relax and enjoy a little peace and quiet at home with the girls. SuperMan has a class this weekend all weekend so we’re girls-only around here for now.  That means PJ’s, hot tea, girl movies and some craftiness I’m sure.  It’s cold and rainy this morning, too, so I have no incentive to get outside and do anything.  The world will have to wait.

Very Pin-Teresting

I thought I’d share with you some of my favorite pins with you – things I’ve pinned lately to try (or have tried).

New Things to Cook

(View my pin board here)

Grilled Mozzarella Sandwiches on garlic bread, serve with a side of marinara. Why have I never thought of this?

  • Does this not look heavenly? Grilled mozzarella cheese sandwiches served up with a side of marinara! It’s like a personal pizza – sounds so good.
  • And I’ve always wanted to try a Texas Sheet Cake – they look sooo sweet, though. This one might be better? It’s a lightened-up version.
  • I remember Mama making cabbage rolls when we grew up – I didn’t like the cabbage but I loved the stuffing. I might try these for the girls.
  • This peach cobbler-cake looks really, really good. I may have to try this with some frozen peaches sometime soon.

Decorating Ideas

(view my pin board here)

Project Life Ideas

(view my pin board here)

One Last Thing

And I’ll leave you with one little bit of silliness – I still laugh when I read this:

Adventures in Artisan Bread Baking (part 2)

I mentioned a while ago that I had received Flour Water Salt Yeast by Ken Forkish as a Christmas gift and that it had started me on a quest to make great artisan bread at home.  You can read my adventures with the first few recipes I tried in that book here.

Not long after I tried my hand at baking the breads in that cookbook, I found out that Artisan Bread in Five Minutes a Day was on sale in the eBook version.  So, I hopped on over to Amazon and got the Kindle version. I couldn’t wait to try out another style of baking artisan breads and the “five minutes a day” hook was certainly intriguing to me.  Especially after taking two days to make a loaf of bread using Forkish’s methods.  Don’t get me wrong, those breads were totally awesome, just time consuming. But as he says, good bread takes time. So, how would a five minute bread compare?

I was ready to find out.

The secret, as they call it in the book, is to make enough dough to last several days (or for several loaves) and keep it in the refrigerator.  You mix once, and bake many.

I can do that, I thought.  Let’s give it a shot.

As with Forkish’s method, their dough is a wet dough. Much wetter than the other bread doughs I’ve been accustomed to making. But since I’d just made the other breads, it didn’t seem strange to do it this way.  I found a 2 1/2 gallon bucket that I’d had stashed and mixed up my dough in that.  Just as with the Flour Water Salt Yeast bread those were the only four ingredients.   What was different was that there was no long proofing time and no long rise time.  Strange, I thought.

I made my first batch one afternoon and let it sit in the refrigerator overnight although the book said you could mix the dough in the morning and bake your bread that evening if you chose.  I didn’t mix my dough until late in the day so I let it rest overnight.

The next afternoon, I baked the bread.  Another difference was the baking method.  With Forkish’s method, you bake in a covered Dutch oven to get the steam going and crust development.  With the 5 Minute method, you bake on a baking/pizza stone and use a separate container of water in the oven to accomplish the steaming and crust development.  I was curious to see what differences there would be, if any.

So, I baked, and peeked through the oven door watching it baking and wondering how the final bread would turn out.

I tried the Light Whole Wheat Bread recipe.  The recipe states it will make four 1-pound loaves. In my first batch, I only got two loaves out of the mix.  However, I think my loaves were closer to 2 pounds each. I decided that rather than doing a free-form loaf baked on the pizza stone, I wanted to try using my Pampered Chef stoneware loaf pan. 
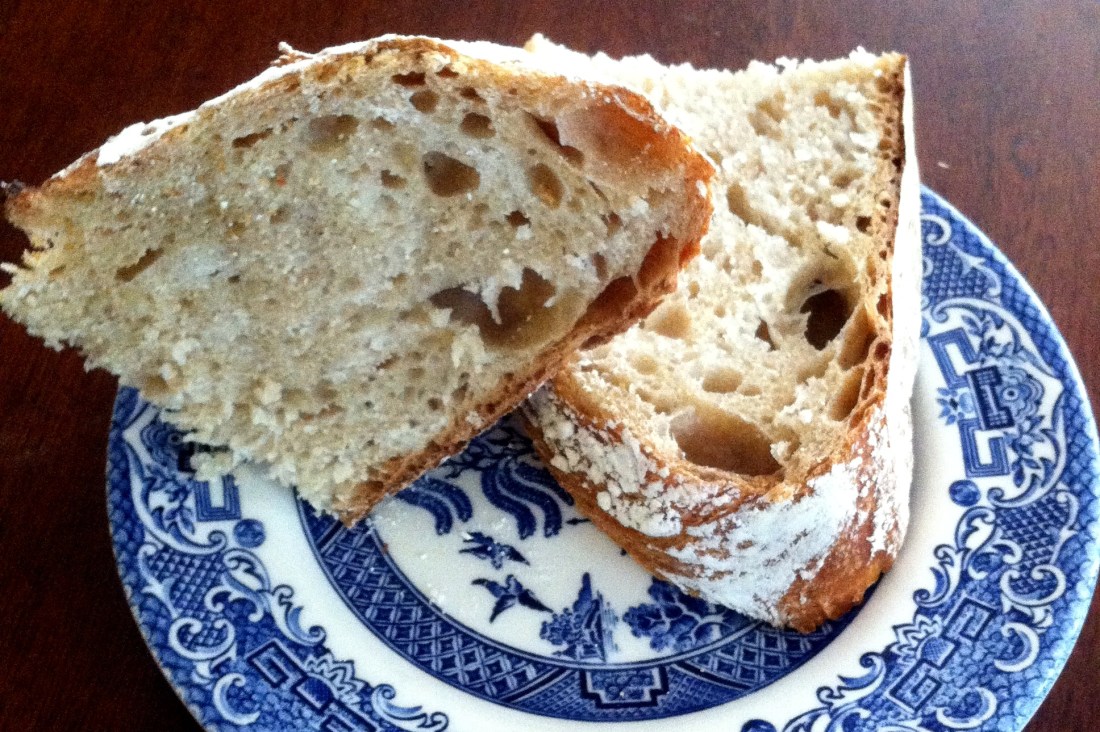
I figured the stoneware would work the same and I’d get a pretty loaf-shaped loaf of bread.

I was not disappointed.  It turned out well. So well, in fact, that we gobbled it up almost immediately. Fresh, warm bread out of the oven, slathered with a little butter. What could be better?

As I continued to read the book, I saw that they say the later loaves from the dough (that have sat for a few days) bake up with a sourdough taste to them – from the ongoing fermentation of the bread that happens as it sits in your refrigerator.  The second day’s batch was even tastier than the first and it did indeed have more of a sourdough flavor to it.  Not the same complexity of flavors as the breads I made from Flour Water Salt Yeast, but still good.  Perfectly good for sandwiches and everyday eating. Especially since I mixed the dough once and got two separate batches of bread out of it.  I loved the quick prep times and the easy payoff of bread dough waiting in the fridge to be popped in the oven.

My only complaint? That the bread didn’t rise very much. It didn’t have the big bubbles and high rise of the other artisan breads.  Now that could be (and most likely is) my fault.  I may not have had the water hot enough. (or too hot) I may not have measured my yeast accurately enough. It was rainy so the dough may have been too wet. There is no telling. Bread is a delicate balance of all of these things – so it’s always a guess as to what goes right or wrong when you bake.  The only secret is to keep baking, take notes, and replicate what works well.

And so that’s what I’ll do.

I’ll keep baking.

I’m planning to continue to try recipes from both cookbooks. I figure eventually I will come up with a recipe and method that works for my family and schedule.  And then bread nirvana will be obtained. Smile

Until then, I’ll have lots of fun tasting the samples.

Get your own copies of the books:

Project Life Tuesday ~ 12 Feb 13

Hello and welcome to Project Life Tuesday!The Mom Creative

If you are stopping by from The Mom Creative, welcome & thanks for clicking over! If you are not, you might want to click over there when you’re done here for some more great Project Life inspiration!

This year, I’m doing a digital version of Project Life. I’m using (mostly) the Turquoise Edition of Project Life supplemented by some other digital kits as they strike my fancy from week to week. I’m also planning to purchase the digital versions of a few of the new Project Life kits that were launched at the trade shows this winter (as soon as they’re available in the spring) to mix things up a bit for the year.  I have found, in doing this for three years now, that I get bored with the same kit from week to week and I like doing things differently to suit the mood of the photos for the week (or my mood as I’m scrapping them!)

This past weekend I decided to get started on my 2013 pages – It’s already mid-February and although I’ve still not finished 2012, I figured I didn’t want to get any more behind on 2013 and then be so overwhelmed I wanted to quit altogether! I’ll try to do one 2012 page spread and one 2013 page spread each weekend. Maybe that way I’ll get caught up and not any more behind than I already am!

I started my 2013 cover page:

2013 Family Album - Page 001

I didn’t want to fill all the slots, though. I want to put some family pictures here and I usually like to use my favorites from the year on the cover page.  This one of the girls with their cousins I absolutely love, so it had to go on the front page.

And here’s the first two-page spread of the year:

2013 Family Album - Page 002

The last week of 2012/first week of 2013 – still hanging out with my brother and his family at Mom’s house. I love, love, love these pictures. They really capture our visit – lots of smiles and lots of fun times together.

2013 Family Album - Page 003

How about you? How’s your 2013 memory keeping going?

comments-graphic2_thumb.jpg


Menu Plan Monday: Trying new things

I’ve been in a bit of a slump lately with regards to cooking. Not really in the mood to cook the “same old same old” and not really up to trying a bunch of time-intensive new recipes.  I’ve really been in the mood for quick and simple, you know what I mean?

But I spent some time on Pinterest the other day (what a great way to pass the time and pretend you’re being productive, right?) and I found some great new recipes I want to try. I thought I’d share some of them with you here today.  I’m planning to try some over the next couple weeks – adding one or two into the rotation.  As you know, I put together a pretty exhaustive list last week of some of the family favorites I plan to cook in the next month.

image

 This will make things more interesting – mixing up some of the old standbys with some new recipes.

MPM-Fall_thumb.png

Chicken Alfredo Roll-Ups Spring Ramen Chicken Soup
Grilled Cheeseburger Wraps Baked Ravioli
Cheddar Chicken Bacon Ranch Pasta Honey Soy Chicken Drumsticks

I think I’ll have fun trying these out – and that the family will enjoy them – especially the soup and roll-ups. Those are high on my list of things to try.

What about you?

Anything new you’re trying this week?

comments-graphic2_thumb.jpg