menu planning at the next level

Many of my close friends are teachers.  As we neared the beginning of school I started to think about how crazy our lives were about to become with schedules, homework and after-school activities.  And then I thought about my friends… the teachers who spend their days devoted to other people’s kids and often find themselves at the end of the day with tired bodies, hungry families and no plans for dinner.

And so I decided to start a new tradition this year.

We did a cooking day.  A monster, stock  the freezer, cook until you drop kind of day.

Planning & Preparation

After I suggested the idea, one of my sweet friends helped me to put together our menu of dinners and to complete all the shopping for our cooking day.  We picked five dinners we thought would be winners and made a spreadsheet (I’m that kind of gal) with the menu, the recipes, and the grocery list of all the items on the recipes we’d need to buy.

image

We planned for one meal per recipe per family, included things like disposable casserole pans and freezer bags to make the storing even easier.  We sorted further into which stores we were going to purchase items from, planning to go to our local warehouse store, Aldi (for the bargains) and then finishing up whatever we couldn’t get at those two places at the grocery store.

And then we planned a massive shopping trip. It was a rainy day when my friend Cindy and I headed out with the girls in tow and our shopping list and grocery bags at the ready.  We started at Aldi and got as much there as we could, finishing up at our local grocery store.  (in a side note, I was amazed at the bargains we found at Aldi. They’ve got my business in the future, for sure)

IMG_3636

That afternoon, Cindy took the chickens (8 of them!) and roasted them at her house. I took the sausage and hamburger meat and got it prepped at my house.  That left us down to assembly and minimal cooking for the next day when the rest of the crew joined us to work.IMG_3545[1]

I also decided to go ahead and make the batch of spaghetti sauce that we were planning to freeze for each family.  That’s the most sauce I’ve ever made in my life, but it turned out soooo good.

I couldn’t help but think of my grandma (who taught me to make this sauce) and wondered if she was looking down on me and smiling at my massive cooking project.

IMG_3546[1]

Cooking & Assembly

Saturday morning dawned bright and early and I was wondering what in the heck I’d been thinking with this cockamamie scheme to do a massive cooking day.  I sure hoped the promises I’d made to my friends worked out and that everyone was happy with the results of our work.

I sorted all of our groceries on the counter with each recipe, writing the basic measurements for the recipe and assembly instructions on a piece of paper with each pile of ingredients.  I was hopeful we could just move from one recipe to the next and follow those cheat sheets to do the assembly.

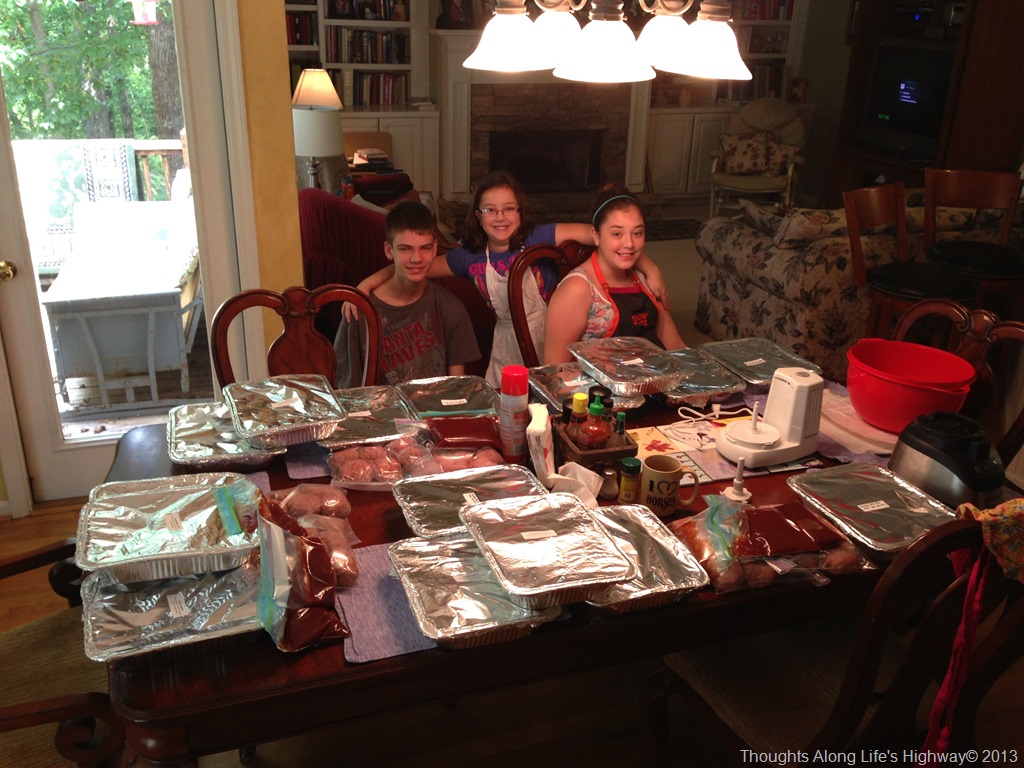
Once Cindy and Kim arrived, we tackled the most time-intensive recipe first (chicken spaghetti) and moved on from there.  The kids got in the game, too, helping with assembly and packaging also.

IMG_3553[1]

I was surprised at how smoothly it went – and how much fun we had.  We worked hard, for sure, but there were a lot of laughs, a lot of fun and we loved spending time together.

IMG_3558[1]

Here’s our finished spread of food.  The kids were pretty proud of themselves for helping us (and we were so appreciative)  We ended up with EIGHT meals per family (after our original estimate of five) because some of the recipes cooked up larger portions (11×13 pans) and we split them into two smaller casserole dishes.

The exciting part was that we ended up with a per-meal cost of about $8.  So, around $60 per family for everyone to eat healthy and happy for the first month of school.

In addition, we’ve all been thoroughly enjoying our dinners.  My friends have been reporting in when they’ve used a dinner and we’ve all agreed it was well worth the time and effort to do this.  It’s been so nice to pull one of the dinners out of the freezer at the end of a busy day and know that your family is going to eat some good food and you don’t have to kill yourself to provide it.

So, I am pretty sure we’ll be doing it again.  I’ll keep you posted on what we decide to do in September.  Here’s our menu for August’s dinners:

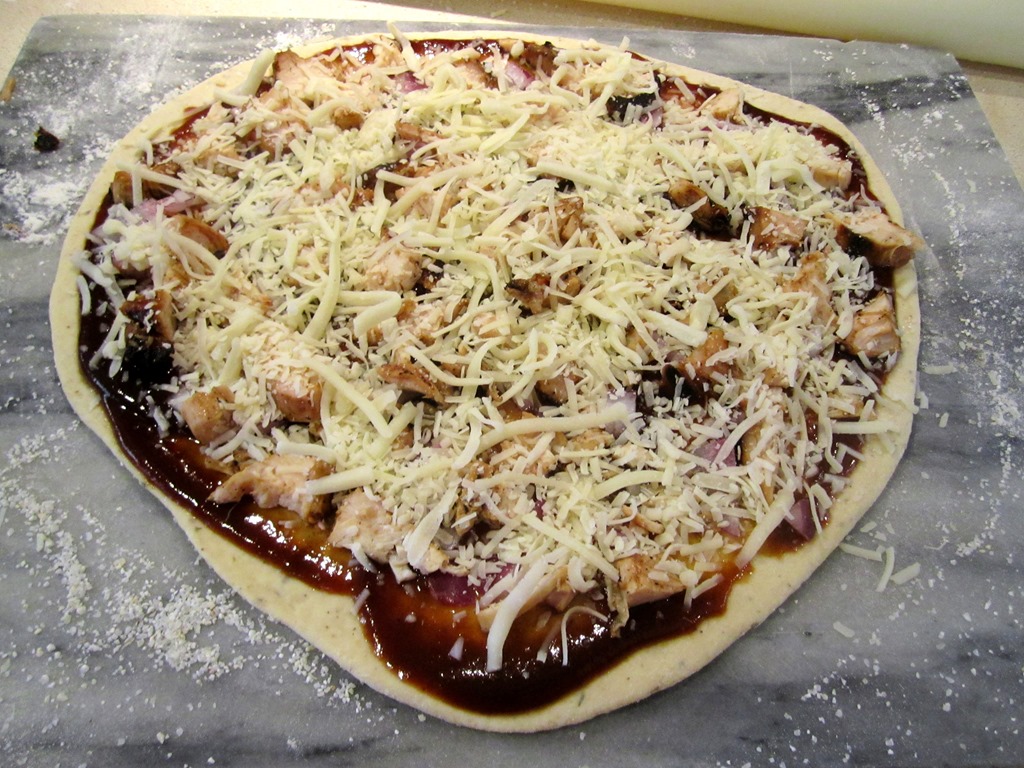
Oh, and one other thing – we had enough food left over that we were able to sit down together and have BBQ chicken sandwiches for lunch! A well-deserved lunch to celebrate our hard work.

IMG_3560[1]


Cinnamon Bread

I found this recipe on Pinterest (imagine that!?!) and decided that it sounded way too good to not try it out.

Amish Cinnamon Bread was what the recipe was called, but then she talked about how it was an alternative recipe to traditional Amish cinnamon bread which, apparently takes a long time to make.
I have to say, this one didn’t take long at all.

IMG_3147And it was really, really good.

Most definitely worth the trouble to make.  And, really, it wasn’t that much trouble anyway.

As you can see here, the recipe makes two LARGE loaves.  As a matter of fact, next time I make it I will probably make three loaves.  See the “overflow” in the oven there?  It was like the incredible alien-possessed bread when it baked.

It rose

and it rose

and it rose

all over my oven.

IMG_3146

So, a word of caution to you. Put a cookie sheet under your loaf pans when you bake this.

And maybe consider putting into three loaf pans instead of two.  Makes good gift-giving.

The bread itself is very light and fluffy. Almost cake-like. But not too sweet. Just enough. Especially with a cup of tea in the morning (or coffee).

I think, too, it would be good to make in muffin form to have for easier sharing for a crowd.

Of course, this is so good you are not going to want to share. But there will be plenty so share away.

IMG_3147

Cinnamon Bread

Makes 2 or 3 loaves

Batter:

1 cup butter, softened
2 cups sugar
2 eggs
1 tsp vanilla
2 cups buttermilk
( You can make buttermilk with 2 C milk + 2 Tbsp vinegar or lemon juice. – Let it sit for about 5 minutes before you use it.)
4 cups flour
2 tsp baking soda

Cinnamon/sugar mixture:

1 cup sugar
2-3 teaspoons cinnamon

Instructions:

  1. Cream together butter, 2 cups of sugar, and eggs.
  2. Add milk, flour, and baking soda.
  3. Put 1/2 of batter (or a little less) into greased loaf pans (1/4 in each pan).
    If you are making 3 loaves, split the half of the batter between the three loaf pans, reserving the other half for the next step.
  4. In a separate bowl, mix cinnamon and sugar together.
  5. Sprinkle 3/4 of cinnamon mixture on top of the batter in each pan.
  6. Add remaining batter to pans; sprinkle with remainder of cinnamon sugar mixture.
  7. Swirl with a knife.
  8. Bake at 350 degrees for 45-50 min. or until toothpick tester comes clean.
    Be sure to put cookie sheets below the loaf pans in case you have some overflow.
  9. Cool in pan for 20 minutes before removing from pan.
    (this is important or it will fall apart. this is not a bread you can eat straight out of the oven)
  10. Slice & serve.

Sunshine in a cake

Revisiting one of my all-time favorite recipes today.

If you haven’t tried it before, you should!

Springtime makes most of us instinctively want to clear things out – out with the old, in with the new. Out with the clutter, out with the dark tones of winter, out with the heavier foods and in with the light. Lighter colors, lighter clothes, lighter foods. This is one of my favorite things to make in the springtime.

Mom stumbled across this recipe years ago. It’s been one of our standbys ever since. It is so easy and quick to make, yet it is from scratch and feels wholesome to prepare.

IMGP3410

I love the light texture of the cake – it’s technically a pound cake, but it is in no way heavy like some pound cakes are. This cake bakes up light and airy. The flavor is light as well – it sings of springtime, with its hints of orange, lemon, and apricot. There is a glaze in the recipe, although I never make it. My kids are anti-glaze, anti-icing, and prefer their cakes and cookies au naturel. Works for me. Less sugar to consume. Anyway, I hope you will give this a try.

The first time I made it, I thought, “Apricot? Really? Huh.” But, I am so glad I tried it. It is one of the family favorites – and one that is requested often by our friends as well. I would imagine you could substitute the apricot juice with some orange juice or even lemon juice, but I love it just as it is and have never felt the need to swap it out. I buy the six pack of the little bitty apricot juice cans in the grocery store, so I always have one on hand for the cake.  It takes about half of one of those cans in the cake and I use the rest in the glaze if I make the cake for friends.

IMGP3407

Sunshine Cake

3 cups sugar (I use 1 1/2 cups Splenda sugar blend)
3 cups all-purpose flour
1/2 tsp salt
1/4 tsp baking soda
1/2 cup apricot juice/nectar (or you can use apricot brandy)
1 cup sour cream (do not use low fat sour cream, it won’t work here)
1 cup butter, softened
6 eggs
1 tsp orange extract
1 tsp lemon extract
1 tsp vanilla extract

Glaze:

1 1/2 c powdered sugar
1/2 c (apprx) apricot nectar
*if you have them on hand, you can zest a lemon and/or orange into the batter and glaze. It just amps up the flavor.

  1. Preheat oven to 325 degrees.
  2. Grease and flour Bundt pan or tube pan.
  3. In large mixing bowl, cream butter & sugar.
  4. Add in the apricot juice.
  5. Add the sour cream, extracts and eggs, making sure they are incorporated thoroughly.
  6. Add the dry ingredients (flour, baking soda, salt)
  7. Pour into baking pan.
  8. Bake for 1 hour and 20 minutes or until toothpick inserted comes out clean.
  9. Cool for 20 minutes before inverting onto cake plate.
  10. Continue to cool for approx. 30 minutes more or until cake is completely cool.
  11. Drizzle with glaze, if desired.

Heaven in a cookie

A friend of mine made these cookies a few weeks ago.
It was love at first bite for me.

Seriously.

I wasn’t sure I was going to be able to restrain myself. They were SO good.

So, of course, I got the recipe.

IMG_2440

And tried to figure out when I’d have a good excuse to make a batch (or two).

That opportunity arose last weekend.  We were having a weekend picnic with our friends and then hiking afterwards.

Hmm… hiking = burning calories. I must find a way to replace said calories.

I know!

COOKIES!

And thus the baking began.

These are sort of a cross between a cookie and a brownie.  They have a little “bite” to the outside of them, but the inside is moist and soft (and chocolately) like a brownie.

They’re seriously good.

Dangerously so.

The original recipe is a Williams Sonoma recipe.  I changed mine up just a bit, so the recipe below is how I made them.

My friend tried one of mine on Sunday – she loved the modifications I’d made. I’d call that success!

IMG_2439

Chocolate Crinkle Cookies

Ingredients:

1/2 cup powdered sugar (or more if needed)
1 2/3 cup all-purpose flour (I used King Arthur white whole wheat)
1/2 cup Hershey’s Special Dark Cocoa Powder
1 1/2 tsp baking powder
1/4 tsp salt
1 stick (8 Tbsp) butter, at room temperature
1 1/4 cup sugar
2 eggs
1 tsp vanilla extract
1/2 tsp peppermint extract (optional)

Instructions:
  1. Preheat oven to 350 degrees F.
  2. Place the powdered sugar in a small bowl and set aside.
  3. If you don’t have a nonstick mat for your cookie sheets, grease them (2) with butter.
  4. In a large mixing bowl, combine the butter and sugar until creamy.
  5. Add one egg and beat until blended.
  6. Add the other egg and extracts and combine.
  7. In a separate bowl, combine the flour, cocoa, salt & baking powder.
  8. Slowly add these ingredients to the egg/butter/sugar mixture, keeping your mixer speed on low.  The dough will get thick quickly. Beat until just blended.
  9. Using a tablespoon (or cookie scoop) scoop up a rounded spoonful of dough. Form into a ball.
  10. Roll the cookie balls in the powdered sugar to coat.
  11. Place on the cookie sheets, about an inch or two apart. (I got four across on my cookie sheets)
  12. Bake 10-12 minutes. You’ll know they’re done when they are cracked and puffy.
  13. Remove from the oven and set aside to cool for about 2-3 minutes.
  14. Remove from baking sheet and allow to cool completely on wire racks.
  15. Store in an airtight container. (makes about 24 cookies)

Die of happiness.

You can thank me later. Smile

Garlicky Shrimp with White Beans

I got the latest issue of Good Housekeeping magazine on my Nook the other day because I saw Dr. Oz on the front cover and I wanted to see what he had to say inside.

image

While I was nursing a sore back on my heating pad Sunday afternoon, I ran across this recipe in the magazine.  We happened to have all of the ingredients on hand so I decided to make it for dinner.

IMG_2434

I was a little unsure while it was cooking – unsure as to whether or not I’d like it since I’m not always a huge fan of seafood.  However, once it was all put together, I was pleasantly surprised. It was a tasty (and filling) dinner for SuperMan and me.  (the girls wimped out on trying it and ate leftover pizzas – win some, lose some, I guess)

Would I make it again? Absolutely.

What would I do differently? More garlic, more salt (a little) and some type of green (julienned spinach?) tossed in there, I think. And probably use spaghetti as the recipe called for. I used twists on Sunday.

Should you try it? Most definitely, if you like shrimp!

Garlicky Shrimp with White Beans

(adapted from Good Housekeeping Magazine)

12 ounces spaghetti (I used whatever pasta I had on hand)
1 pound shelled and deveined large shrimp (I used frozen medium sized shrimp)
3/4 teaspoon(s) smoked paprika
1 tablespoon(s) extra-virgin olive oil
1 can (15-ounce) no-salt-added white kidney (cannellini) beans, drained
3 Tbsp minced garlic
1 can (15-ounce) petite diced tomatoes
~1/4 tsp crushed red pepper (more if you like it spicy)
1/2 Tbsp dried parsley
Garlic salt to sprinkle on top as you serve (if you like more garlic flavor)

  1. Heat large covered pot of salted water to rolling boil. Cook pasta as label directs. Reserve 3/4 cup pasta cooking water.
  2. Meanwhile, in medium bowl, stir together shrimp and 1/2 teaspoon smoked paprika; set aside.
  3. While pasta cooks, in a large skillet, heat oil on medium-high.
  4. Add beans and garlic. Cook 2 minutes or until garlic is golden, stirring occasionally.
  5. Add tomatoes, red pepper, remaining 1/4 teaspoon smoked paprika, and 1/4 teaspoon salt.
  6. Cook 2 minutes or until tomatoes begin to release their juices.
  7. Add shrimp and cook 4 to 6 minutes or until cooked through, stirring occasionally.
  8. Drain pasta and return to pot.
  9. Add shrimp mixture, parsley, and reserved pasta cooking water; toss until combined.

IMG_2435
Original Recipe: Garlicky Shrimp and White Beans Recipe – Good Housekeeping

Saturday Night is Pizza Night

When I grew up, lunch on Saturdays was always hot dogs (sometimes sandwiches) and dinner was often pizza.  Which was perfectly fine with me because I absolutely love pizza. Sometimes, Mama would make homemade pizzas, using leftover spaghetti sauce and we’d get to top our own pizzas. Those were always my favorite because they were meaty and heavy with my favorite toppings.

We’ve been making homemade pizzas for a while now. I had shared a grilled pizza dough recipe a while ago, which is one of the standard recipes we used all of the time on the grill and in the house.  However, because I’m not one to leave things alone, I’ve continued to fiddle with the recipe and research more recipes and I’ve come up with a pretty darn good recipe that we’ve been using for the past few months.

This recipe makes two fourteen-inch (sort of) pizzas, or four “personal” sized pizzas if you divide the dough into smaller pieces.  One of the things I love about this dough is that it bakes up light and crispy – especially if you use a pizza stone and a screaming hot oven.  IMG_2304

A few things to know:

  • Using a pizza stone makes a MUCH better crust.  And pre-heat the stone while you’re pre-heating your oven.  Then the crust will crisp quickly when it hits that hot stone.
  • Cook in a HOT (HOT!) oven – I usually cook mine at 500 degrees (F).  If I didn’t set off all of the safety mechanisms on my stove and range hood, I’d do it hotter, but I’ve learned that it’s not worth having all the alarms go off for 50 degrees more heat. Smile with tongue out
  • Rising time is important. Plan your meal prep with enough time to allow at least 45 minutes for the dough to rise. You really can’t rush the little yeasties. Patience will pay off.
    IMG_2293

    ^^ before the rise ^^

    IMG_2294

    ^^ after 45 min rise time ^^

  • Get some grits. I know this sounds crazy, but we have learned (the hard way) that your pizzas will not slide off of a peel or cutting board very well once the dough is a little warm from rolling it out and then heavy from adding the toppings.  Last week we had cheese, dough, etc. all over my oven door and floor because of an uncooperative pizza that didn’t want to slide off of the peel.
    Grits (corn meal) under your dough (before you top your pizza) will act like little marbles and let the pizza slide right off of the peel.  And they add some crunch to your crust!
  • If you don’t have grits (you’re not from the South, are you?) then you can always roll your dough out on parchment (not wax) paper and bake the pizza on the parchment paper.  You just have to be careful because the parchment gets really crispy (brittle) in the oven and makes it a little tricky to pull the pizza out of the oven.
  • You can make this in a stand mixer or in your food processor. I’ve done it both ways. It usually depends on which appliance happens to be out on my counter at the time (or which is clean and not dirty!) Heck, you can even mix this by hand if you want. It’ll be a good workout for you. Winking smile
  • We usually get two meals (at least) out of this pizza-making session. One the night we make them and then one for lunch or supper a few days later. And it’s WAY cheaper than takeout pizza (and SO MUCH tastier!)

Pizza Dough

1 cup very warm water
2 1/4 tsp yeast
1 Tbsp honey
2 tsp salt
2-3 Tbsp grated Parmesan cheese (like Kraft Parmesan)
2 Tbsp olive oil
1 Tbsp Italian Seasoning
~3 Cups flour (I used King Arthur White Whole Wheat flour)

  1. In a mixing bowl, combine water, yeast & honey. Let the yeast “bloom” for about 5 minutes.
  2. Add the oil, half of the flour (1.5 cups) and mix with a dough hook.
  3. While mixing, add the Italian Seasoning, salt and gradually add the remaining flour a little at a time until the dough begins to form a ball and pull away from the sides of the bowl.
  4. Knead for 6 minutes.
  5. Once the time has elapsed, remove the dough hook and form the dough into a ball.
  6. Lightly oil the mixing bowl and put the dough ball back in.  Cover with a towel and let rise in the for 45 minutes to an hour. (preheat your oven while dough is rising)

In Action

Here’s our little pizza making session Saturday night:

PL 4x6 print pages - Page 061

^^ Rolling out the dough – topping the kids’ pizza ^^

PL 4x6 print pages - Page 062

^^ SuperMan making his monster pizza with 45 toppings. I swear it weight 10 pounds! ^^

IMG_2309

^^ Topping my BBQ Chicken pizza. ^^

IMG_2311

^^ The masterpiece ready for the oven. ^^

IMG_2313

^^ SuperMan says quit taking pictures and let’s eat! ^^

Wonderful Waffles for Supper

I’ve gotten on a “breakfast for dinner” kick.

It’s super easy, inexpensive, and lets you enjoy some breakfast-y things that you would not normally have time to make during the week at breakfast time.

Like waffles.

You see, I’m not a morning person. Never have been.

And so, my kids suffer at breakfast because I’m struggling most mornings to be vertical and coherent for them.  Cooking fantastical breakfasts is just not going to happen.

But cooking an awesome “breakfast” for dinner? Totally do-able.  I’m awake at 5PM, just not so much at 5AM.

So, we’ve been making breakfast for dinner the past few weeks… It’s sort of become our Thursday night dinner tradition since the kids aren’t wild about leftovers and Thursdays are a busy day with dance classes, etc.

I’ve been hunting for a good waffle recipe. Something that was a “scratch” recipe and not from a box.  Last week we tried one that was just okay. Not great, and not something we wanted to try again –

And so this week I went looking for new recipes to try.

What I found was that there are not too many variations – eggs, flour, sugar, etc.

What did differ was whether the egg whites were whipped or not.  The first recipe we had tried did not have the whipped egg whites and the waffles were flat – in taste and volume. I wondered if whipping would make a difference, but, quite honestly, it seemed like a lot of extra work. Was there really a payoff?

Then I found a recipe on Food Network’s website for “Waffles of Insane Greatness” which are from Aretha Frankenstein’s restaurant in Tennessee. Right off the bat I was intrigued – the name of the waffles, the name of the restaurant and the fact that it was a southern recipe.  Then I saw that you don’t have to whip the egg whites. Score!!

I had also found this recipe for the Very Best Waffles (they claimed) – I printed it out and compared to the Insane waffle recipe.  Pretty much the same with the exception of the addition of some spices.

I had one other requirement for my waffles that no recipe included but that was non-negotiable for me. They  had to have some added protein.  I couldn’t handle the carb-fest myself and wanted to be sure the family got a little more protein in their dinner, even if I had to sneak it in. I figured I’d improvise that part.

I headed into the kitchen to give it a go…

waffles

They turned out, well, wonderful…

So much so, that, as I’m typing I’m nibbling on one, cold & dry, and yet it’s still good.

The kids loved them, SuperMan devoured them, and after I ate one, I collapsed on my rocking chair in a blissful carb coma.  (but it was worth it)

So, give these waffles a try – it’s a fast and easy way to whip up some supper one night without a big ole mess in the kitchen.  Serve them up with some bacon, fresh fruit and you’ll have your family singing your praises…

Wonderful Waffles

Ingredients:

Dry ingredients:

3/4 cup all-purpose flour
1/4 cup cornstarch
1/2 tsp baking powder
1/4 tsp baking soda
1/2 tsp salt
1 1/2 tsp sugar

Wet ingredients:

1 cup buttermilk (or whole milk mixed with about 1 1/2 tsp white vinegar to make 1 cup of “buttermilk”)
1/3 cup vegetable oil
1 egg
1 tsp vanilla extract

Optional Ingredients:

1/2 tsp almond extract (optional)
1/8 tsp ground nutmeg (optional)
1/4 tsp ground cinnamon (optional)

2 scoops vanilla protein powder

Instructions:

1. In a mixing bowl, combine the dry ingredients.

2. If using, add the cinnamon & nutmeg to the dry ingredients.

3. In a measuring cup, combine the buttermilk, oil, extracts and egg. Combine gently.

4. Pour liquid ingredients into the dry ingredients and use a whisk to combine.

5. Let the batter sit for 5-10 minutes while your waffle iron heats.

6. Spray your iron with nonstick cooking spray and ladle some batter onto the iron. Bake them as per the instructions for your iron.

7. Serve immediately or keep warm in preheated oven until ready to serve.

A couple of things to note:

– I doubled the recipe and got 10 waffles. Depending on how many people you’re feeding you may need to double as well.

– I think next time I will preheat my oven to 200 degrees, as the one recipe suggests, and put the finished waffles on the rack in the oven to stay warm until they’re all finished being made. That way we can sit down and eat together rather than in shifts as I finish up waffles.

– The almond extract, nutmeg and cinnamon are completely optional but I put them in and I think it added a great flavor. Big Girl was not crazy about the nutmeg. I may leave it out next time since I’m the only one who is really nuts about nutmeg around here.

– The protein powder is also optional and using it only enhances your protein content of your meal. You don’t need to add any extra liquid if you it. (or take any away if you don’t)

– I had a few left after we ate dinner and I put those in a ziplock bag in the refrigerator for breakfast the next day.  I reheated them in the toaster oven.

Cream Cheese Coffee Cake

I stumbled across this recipe on Pinterest and have made this coffee cake several times now  – with rave reviews every single time I make it.  Even my kids love it.

Coffee Cake

While the original recipe was really good by itself, I thought I’d share the recipe the way I make it, too.

Here you go –

Cream Cheese Coffee Cake

Filling:

2 Packages Neufchatel Cheese, softened (low-fat cream cheese)
1/2 cup sugar
1 tsp vanilla extract
1 tsp almond extract
1 egg

Cake:

1 cup sugar
1 stick (1/2 cup) butter
1 cup sour cream (low fat is fine)
4 eggs
1 tsp vanilla extract
1 tsp almond extract

1/2 tsp salt
1/2 tsp baking soda
1 tsp baking powder
3 cups all-purpose flour

Streusel Topping:

1/4 c sugar
1/4 c flour
3 Tbsp butter (chilled & cubed)

Glaze:

1/4 cup (give or take) powdered sugar
1 – 2 tsp milk

  1. Make the filling: In a small bowl, using a hand mixer, mix the filling ingredients until they’re well combined. Set aside.
  2. Preheat oven to 350F.
  3. Spray/Grease a 9×13 Pyrex cake dish.
  4. Make the cake:  In a mixing bowl, cream the sugar & butter.
  5. Add the sour cream and extracts.
  6. Add the eggs, one at a time, mixing until combined.
  7. Add the salt, baking soda and baking powder.
  8. Add the flour gradually (so you don’t have a flour storm in your kitchen)
  9. Spread about half of the cake mixture in the bottom of the 9×13 pan. You may need to use an offset spatula to spread the batter.
  10. Pour the filling on top of the batter in the pan.  Using a spatula, spread to form an even layer across the batter.
  11. Take the remaining batter and add to the top of the filling. You will need to carefully spread this across the filling to form a third layer.
  12. Make the streusel:  In a small bowl, mix the streusel ingredients with a fork. Or, if you have a small food processor/chopper, mix the ingredients in that. It is important that the butter be COLD to properly form the streusel.  You will end up with oatmeal-like texture if your butter is the proper temperature.
  13. Sprinkle the streusel on top of the batter.
  14. Bake 45 minutes at 350 degrees .
  15. Cool completely on a wire rack (about an hour or so)
  16. Make the glaze:  Combine glaze ingredients in a small bowl or measuring cup. Add milk SLOWLY until you get the desired, drizzly texture. Depending on humidity you will need more/less milk.
  17. Store in a cool place in a Tupperware or sealed container.  Refrigeration is probably a good idea in a hot climate.

This tastes absolutely divine with a cup of Earl Grey or coffee. And it’s not too shabby with a cup of cold milk, either. As a matter of fact, it’s pretty darn good no matter how  you serve it – even if you eat it out of your hand as you dash out the door to go somewhere. Not that I’ve ever done that or anything… wink, wink.

Adventures in Artisan Bread Baking (part 2)

I mentioned a while ago that I had received Flour Water Salt Yeast by Ken Forkish as a Christmas gift and that it had started me on a quest to make great artisan bread at home.  You can read my adventures with the first few recipes I tried in that book here.

Not long after I tried my hand at baking the breads in that cookbook, I found out that Artisan Bread in Five Minutes a Day was on sale in the eBook version.  So, I hopped on over to Amazon and got the Kindle version. I couldn’t wait to try out another style of baking artisan breads and the “five minutes a day” hook was certainly intriguing to me.  Especially after taking two days to make a loaf of bread using Forkish’s methods.  Don’t get me wrong, those breads were totally awesome, just time consuming. But as he says, good bread takes time. So, how would a five minute bread compare?

I was ready to find out.

The secret, as they call it in the book, is to make enough dough to last several days (or for several loaves) and keep it in the refrigerator.  You mix once, and bake many.

I can do that, I thought.  Let’s give it a shot.

As with Forkish’s method, their dough is a wet dough. Much wetter than the other bread doughs I’ve been accustomed to making. But since I’d just made the other breads, it didn’t seem strange to do it this way.  I found a 2 1/2 gallon bucket that I’d had stashed and mixed up my dough in that.  Just as with the Flour Water Salt Yeast bread those were the only four ingredients.   What was different was that there was no long proofing time and no long rise time.  Strange, I thought.

I made my first batch one afternoon and let it sit in the refrigerator overnight although the book said you could mix the dough in the morning and bake your bread that evening if you chose.  I didn’t mix my dough until late in the day so I let it rest overnight.

The next afternoon, I baked the bread.  Another difference was the baking method.  With Forkish’s method, you bake in a covered Dutch oven to get the steam going and crust development.  With the 5 Minute method, you bake on a baking/pizza stone and use a separate container of water in the oven to accomplish the steaming and crust development.  I was curious to see what differences there would be, if any.

So, I baked, and peeked through the oven door watching it baking and wondering how the final bread would turn out.

I tried the Light Whole Wheat Bread recipe.  The recipe states it will make four 1-pound loaves. In my first batch, I only got two loaves out of the mix.  However, I think my loaves were closer to 2 pounds each. I decided that rather than doing a free-form loaf baked on the pizza stone, I wanted to try using my Pampered Chef stoneware loaf pan. I figured the stoneware would work the same and I’d get a pretty loaf-shaped loaf of bread.

I was not disappointed.  It turned out well. So well, in fact, that we gobbled it up almost immediately. Fresh, warm bread out of the oven, slathered with a little butter. What could be better?

As I continued to read the book, I saw that they say the later loaves from the dough (that have sat for a few days) bake up with a sourdough taste to them – from the ongoing fermentation of the bread that happens as it sits in your refrigerator.  The second day’s batch was even tastier than the first and it did indeed have more of a sourdough flavor to it.  Not the same complexity of flavors as the breads I made from Flour Water Salt Yeast, but still good.  Perfectly good for sandwiches and everyday eating. Especially since I mixed the dough once and got two separate batches of bread out of it.  I loved the quick prep times and the easy payoff of bread dough waiting in the fridge to be popped in the oven.

My only complaint? That the bread didn’t rise very much. It didn’t have the big bubbles and high rise of the other artisan breads.  Now that could be (and most likely is) my fault.  I may not have had the water hot enough. (or too hot) I may not have measured my yeast accurately enough. It was rainy so the dough may have been too wet. There is no telling. Bread is a delicate balance of all of these things – so it’s always a guess as to what goes right or wrong when you bake.  The only secret is to keep baking, take notes, and replicate what works well.

And so that’s what I’ll do.

I’ll keep baking.

I’m planning to continue to try recipes from both cookbooks. I figure eventually I will come up with a recipe and method that works for my family and schedule.  And then bread nirvana will be obtained. Smile

Until then, I’ll have lots of fun tasting the samples.

Get your own copies of the books:

Saturday Sweetness: Faux Cheesecake

I stumbled across this recipe while browsing Pinterest the other day and decided I needed to try it.  Cheesecake is one of my absolute favorite desserts. I love the creaminess and the delicate sweetness with the little tang from the cream cheese.  And this little recipe has that same cheesecake flavor but is packed with protein and doesn’t have all the sugar and fat that the traditional cheesecake has.  Why not try it?

So, when I stopped at the grocery this morning to pick up Big Girl’s birthday cake I picked up the ingredients.  The website shows putting the little cheesecakes in individual storage containers but I decided I’d try these cute little individual pie pans.

Blog - Page 005

It was very quick to put together.

I took the Greek yogurt, plopped it in a bowl and gradually sprinkled the cheesecake pudding into the yogurt and stirred it with a whisk. Then I added a few drops (maybe 1/2 teaspoon each?) of the extracts just to give it a little more rounded flavor. Once the ingredients were mixed together, I just spread them into the little crusts and put it in the refrigerator to chill.  When I serve them, I’ll top them with a dollop of blueberry or strawberry pie filling.

I can hardly wait.

The original website says they’re about 112 calories and 12 grams of protein (only 1 gram of fat!)  You certainly can’t beat that for dessert!

Blog - Page 006

“Faux” Cheesecake

  • 1 16 ounce tub of Greek yogurt (plain)
  • 1 small box of Jell-O sugar free cheesecake flavor pudding mix
  • 1/2 tsp vanilla extract
  • 1/2 tsp almond extract
  • 1 package Keebler Ready Crust mini graham cracker crusts
  1. Mix the yogurt with the pudding mix, adding the mix gradually to avoid clumping.
  2. Add the extracts and mix thoroughly.
  3. Spoon into the pie pans and chill before serving.


comments-graphic2_thumb.jpg